How to Clean and Dust Your LEGO Sets Without Damaging Them

This guide covers practical methods for cleaning and dusting LEGO sets — from sealed display models to loose bricks in storage bins — without causing scratches, discoloration, or weakened clutch power. Dust isn't just an eyesore; it settles into crevices between studs, dulls colors over time, and can even attract moisture in humid climates. Whether a collection sits on an open shelf in downtown Asheville or inside a sealed acrylic case, particles accumulate relentlessly. Learning the right approach keeps builds looking sharp and preserves long-term resale value.
What's the safest way to clean dusty LEGO bricks?
The safest approach is dry cleaning with soft tools before any liquid ever touches the plastic. A clean makeup brush — something like a Real Techniques setting brush or any unused soft-bristled paintbrush — lets you whisk dust from studs and tiled surfaces without abrasion. (Think of it as gentle sweeping, not scrubbing.) For tighter spaces between plates and Technic beams, a Swiffer 360° Duster refolded into a narrow wedge reaches corners that fingers can't.
Start from the top of the set and work downward. Gravity is your friend here — dislodged dust falls to lower levels, so if you clean the base first, you'll just re-dust it. Move slowly. LEGO ABS plastic is durable, but persistent friction from a rough cloth or paper towel will leave micro-scratches that catch light and dull the finish. Microfiber cloths — specifically the 3M Scotch-Brite High Performance Cloth — work well for flat surfaces like baseplates and large vehicle panels.
For loose bricks, dump them onto a clean white towel (not directly onto a hard table) and brush each piece individually. It's tedious, yes, but it's the only way to avoid knocking pristine bricks against each other and creating new scuff marks. Some collectors in the r/lego community recommend using a soft toothbrush for heavily textured pieces — castle walls, tree trunks, dinosaur scales — and that's solid advice as long as the bristles are truly soft.
Tools worth keeping in your cleaning kit
You don't need a professional conservation lab to maintain a LEGO collection, but a few specific items make the job faster and safer. Keep a dedicated makeup brush (one that's never touched foundation or powder), a pack of unscented Swiffer refills, a stack of high-quality microfiber cloths, a small squeeze bottle of Dawn Ultra, and a can of compressed air in a labeled bin. Having these ready removes the temptation to grab a paper towel or a rag from the garage — both of which are too abrasive for ABS plastic.
Can you wash LEGO pieces with water?
Yes, you can wash LEGO pieces with water — but only lukewarm water, mild soap, and absolutely no heat. The LEGO Group notes that temperatures above 104°F (40°C) can warp or discolor ABS plastic, so keep the bath warm, not hot. Fill a basin with water, add a few drops of Dawn Ultra Dish Soap, and swish loose bricks gently by hand. Let them soak for ten to fifteen minutes if they're grimy from an attic find or a child's sticky fingers.
Here's the thing: stickers and printed elements need special care. Water won't usually ruin a factory print — those are pad-printed directly onto the brick — but prolonged soaking can loosen adhesive-backed stickers. (If a sticker starts peeling at the edge, stop immediately and let that piece air-dry face-up.) For particularly delicate printed parts — think vintage Space or Pirates torsos — spot-clean with a damp cloth instead of full submersion.
Never put LEGO bricks in a dishwasher or washing machine. The agitation beats pieces against each other, creating the exact scratches you're trying to avoid. The heat cycles in appliances also exceed safe temperatures by a wide margin. After hand-washing, spread bricks on a dry towel in a single layer. A small fan pointed across the surface speeds drying time to a few hours. Don't use a hair dryer — again, heat is the enemy. LEGO's official care page confirms that air-drying at room temperature is the recommended method.
What about electric or light-up LEGO elements?
Never submerge Powered Up motors, battery boxes, light strings, or older Power Functions components. Wipe the plastic housing with a barely damp cloth, then dry it immediately. If dust has settled around ports or buttons, use a dry toothbrush or compressed air. Moisture inside electronic housing ruins the circuit boards — and replacement hubs aren't cheap.
How do you remove dust from built LEGO sets without taking them apart?
You remove dust from assembled sets using low-suction vacuuming, static-charged dusters, and targeted compressed air — all while keeping the build intact. The Swiffer method works wonders here too. Gently glide a duster sheet over the model's broad surfaces, then pinch the sheet into points to trace along rooftops, wings, and cockpit canopies. It picks up dust rather than pushing it around, which matters when you're dealing with a 7,500-piece Star Destroyer that took three weekends to build.
Compressed air — the kind sold in cans for electronics — blasts dust from deep recesses. The catch? Hold the nozzle at least six inches away and use short bursts. Too close, and the propellant can leave a frosty residue on dark bricks or knock off tiny antenna pieces. Some collectors prefer a DataVac Electric Duster because it's refillable and lacks propellant chemicals, though the airflow is stronger, so keep the nozzle even farther back.
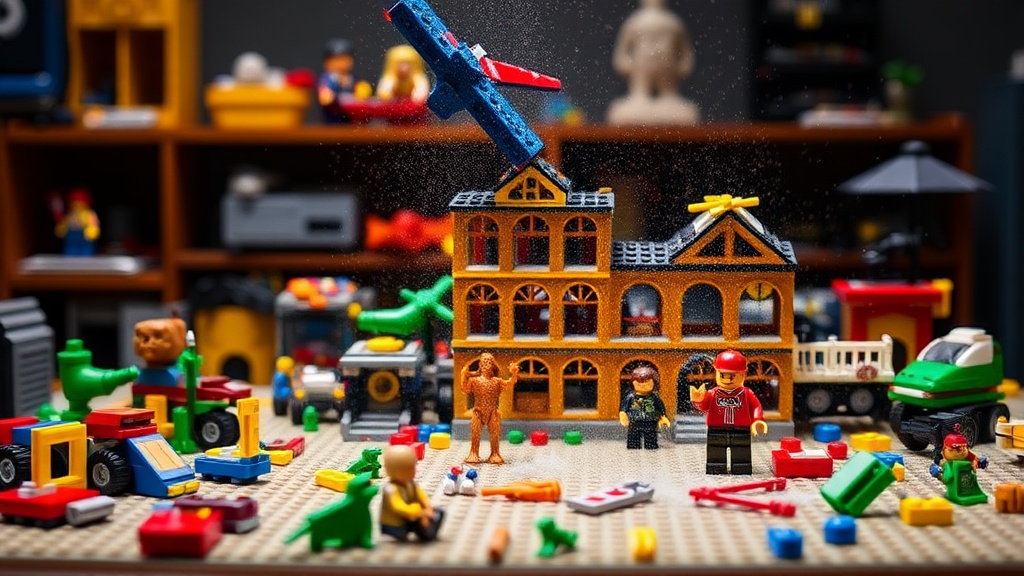
For shelf displays behind acrylic cases, dust the case exterior first. A smudged case makes the interior look worse than it is. Once the case is clean, open it and use a brush on the set itself. Close the case promptly — every minute it's open is an invitation for new dust. In Mateo's Asheville loft, the pollen count spikes hard in spring, so sealed display cases aren't pretentious; they're practical armor against yellowing dust layers.
Dust actually amplifies sun damage. When UV rays hit a dusty LEGO set, the particles create micro-shadowing that leads to uneven yellowing — particularly on white and light grey bricks. A clean surface yellows more uniformly (or not at all if it's kept out of direct light). That's one more reason regular dusting matters beyond simple aesthetics.
| Method | Best For | Risk Level | What You'll Need |
|---|---|---|---|
| Soft brush | Loose bricks & detailed builds | Very Low | Makeup brush or soft paintbrush |
| Microfiber cloth | Flat panels & baseplates | Low | 3M Scotch-Brite or similar |
| Compressed air | Tight crevices in assembled sets | Moderate | Office depot duster can or DataVac |
| Lukewarm water bath | Heavily soiled loose bricks | Low (if done right) | Dawn soap, basin, towel |
| Vacuum with brush | Large display sets on open shelves | Moderate | Dyson with soft brush attachment |
Should you use a vacuum cleaner on LEGO displays?
Yes — but only with a soft brush attachment and the suction turned low. A Dyson V15 Detect or similar cordless stick vacuum with a mini soft dusting brush lets you clean large architectural sets and baseplates in minutes. The bristles act as a buffer, preventing the hard plastic nozzle from scraping against edges. Worth noting: never touch the vacuum directly to stickers, printed minifigure parts, or loose antenna elements. The suction can lift those right off the model.
Test the suction on your hand first. If it pulls hard enough to pinch skin, it's too strong for LEGO. Move the brush in straight lines, not circles — circular motions increase the chance of catching a corner and sending a 1x1 tile flying. (Mateo learned this with a UCS Millennium Falcon cockpit window — found three days later under the couch.) For extra insurance, place a mesh laundry bag or nylon stocking over the brush head. It catches any escaped pieces while still letting air flow through.
How should you clean LEGO minifigures?
Minifigures demand a gentler touch than standard bricks because of their printed faces, torsos, and delicate accessories. A soft-bristled makeup brush is usually enough for displayed figs. For grime that won't budge, dip a cotton swab in lukewarm soapy water and roll it across the surface — don't scrub back and forth. Printed elements from older themes are especially prone to print wear, so avoid any pressure. Remove capes, cloth skirts, and cardboard accessories before cleaning; those should never get wet. Store them upright in a divided organizer like the ArtBin Super Satchel.
How often should you clean your LEGO collection?
Built sets on open shelves need a light dusting every two to four weeks, while sealed display cases can go two to three months between cleanings. Loose bricks in storage bins rarely need attention unless they've been handled recently or exposed to food, smoke, or workshop grime. The key is consistency — a five-minute swipe with a Swiffer every month prevents dust from compacting into the microscopic texture of ABS plastic, where it becomes much harder to remove.
Seasonal deep cleans make sense for serious collectors. During a deep clean, inspect each set for loose pieces, sun fading, or emerging cracks. It's easier to spot damage when the dust is gone. That said, don't over-clean. Every physical contact with a brick introduces minor wear. The goal isn't sterility; it's preservation.
Collectors who buy, sell, or trade should photograph sets immediately after cleaning. A clean model under natural window light shows true colors and attracts better offers on marketplaces like BrickLink. The difference between a dusty listing and a clean one can mean ten to twenty percent in final sale price — sometimes more for retired modular buildings or vintage Technic sets.
Your collection reflects time, patience, and probably more than a few late nights hunting retired sets. Treat the cleaning process with the same care you put into acquiring the bricks. The right tools, the right temperature, and a little restraint go a long way toward keeping every stud crisp and every color vibrant for the next builder who appreciates them.